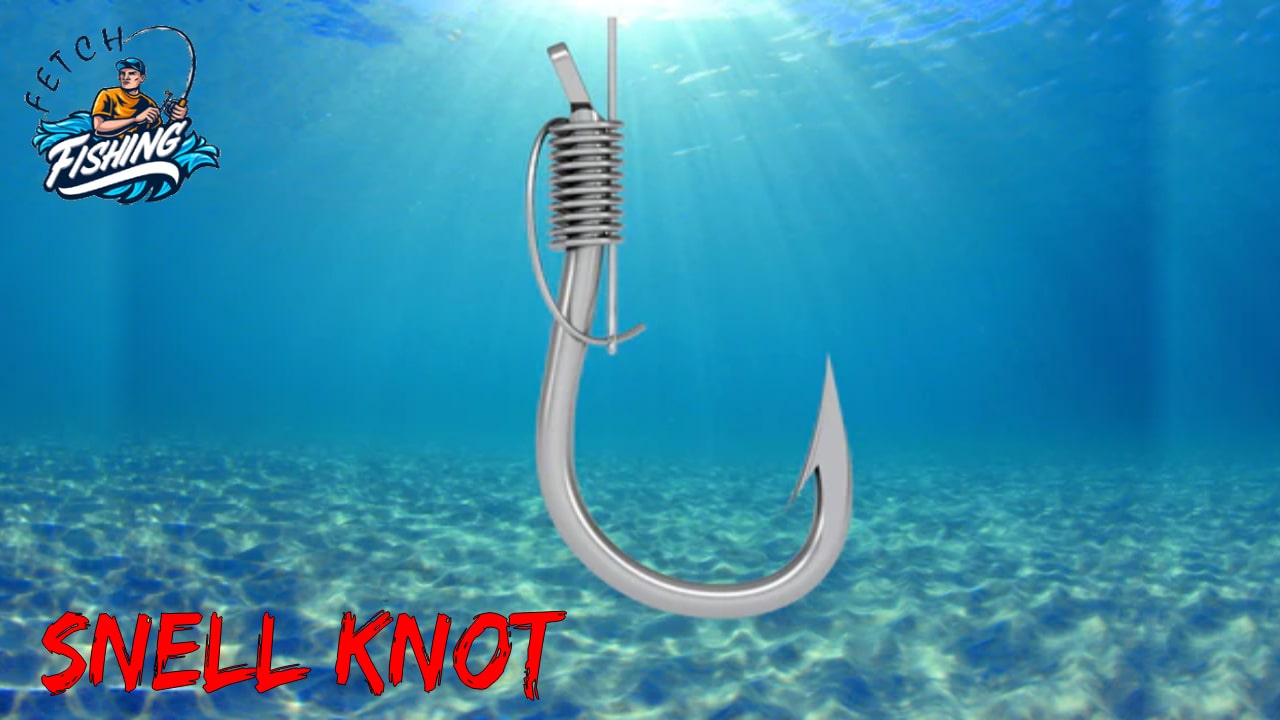
So let me tell you that it is popular to tie a baited hook directly onto a leader or tippet, which is known as a Snell knot and was originally used with eyeless hooks. After this, let me tell you that a straight line with the shaft of the hook is the snail not positioning the line or the leader and creating a knot with plenty of structural integrity. So let me tell you that to maintain the breaking strength of the line as an older type of fishing knot, the snell has a long reputation as a dependable knot. This let me tell you that if the line diameter is less than that of I, this happens only in especially cases. After this, let me tell you that year is how to tie the snell knot mentioned below, so follow the simple steps and do the needful.
Methods to Tie a Snell Knot.

So here are some methods mentioned below to tie a snell knot.
Traditional Snell Knot.
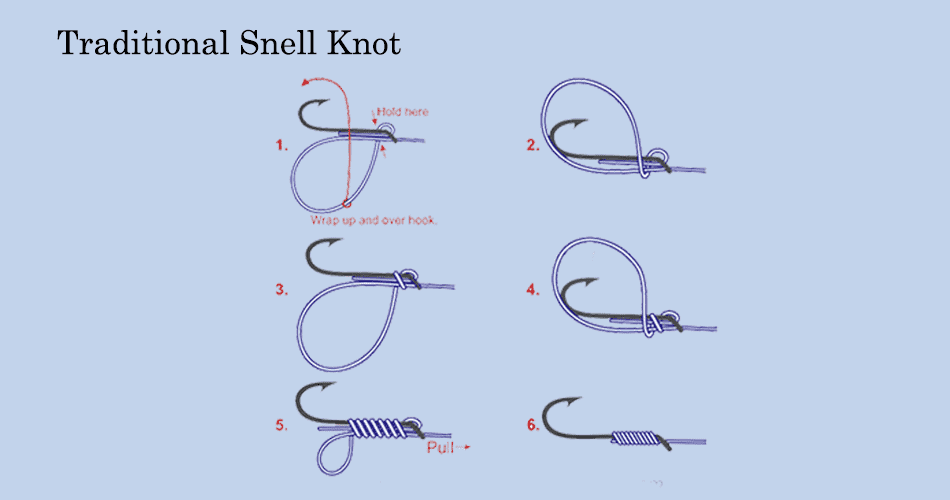
So let me tell you that there is a simple way mentioned below to tie a traditional snell knot.
So firstly, let me tell you that toward the shank and the thread, the line through the hook eye. After this:
- Let me tell you that near the leading, you need to pinch the line, and through the eye-opening, you need to feed it.
- So let me tell you that you need to pull the line through it until it’s a few inches longer, the length of the shaft for more than 8 or 6 inches or 15 to 20 CM.
- After this, let me tell you that some of them considered or some anglers contain that you should always need to thread the line from the front side to the backside.
That is, insert the line on the side of the eye, which is on the same side as the hook’s barbed tip. So let me tell you that when it’s in the water, this makes it the hook in bitter alignment with the line.
So let me tell you that you need to form a large single loop. After this, let me tell you that where you first insert the line, you need to bring the leading around so that it’s on the same side of the eye. After this, let me tell you that with the help of the line, you are creating the letter “O”.
So let me tell you that you need to thread the leading and through the eye again. After this, let me tell you that in the same direction as before, you need to feed it through. So let me tell you that through the eye, this time, the thread is about 2 inches or 5.1 CM of the line. After this, let me tell you that for the first time through the eye, you have to do this thing again. This time, that is, if you go from the front side to the back side, do it again.
So let me tell you that with the help of your thumb and forehead, you need to pinch the hook, eye, and line. after this, let me tell you that you need to pinch right over the hook eye. So let me tell you that the part of the line that runs through the hook eye with the help of The pinch holds on to both and extends away from the hook is the standing end. after you, let me tell you that the line should be running alongside the hook shank, which is the straight portion of the hook you should see that is below your pinched finger around 2 inches or 5.1 CM of leading end. Let me tell you that below your pinched finger, the loop you created should always be there.
So let me tell you that the hook shank and leading end should twice the loop to wrap it around. After this, tell me that with your two free hands, grasp the loop and twist it clockwise. After this, let me tell you that it will wrap the base of the loop to the nearest to your finger over the hook eye and around both the hook shank and the leading, and that extends alongside the shark. So let me tell you that around the hook shank and leading end, try to make a reasonably tight coil. After this, let me tell you that, in the end, this will make it easier to type the entire knot. So let me tell you that your you need to pinch fingers down a bit to hold it in place as well once you finish the coil slide. After this, let me tell you that the hook shank and leading end of the loop will shank in circumference as you wrap it around.
So let me tell you that around 6 to 7 or more times, wrap the loop. After this, let me tell you that around both the hook shank and leading end, create 7 to 8 total coils. So let me tell you that to cover over each coil you make, keep sliding your pinching finger down. After this, let me tell you that by the noose coil, you are essentially making a noose with the hook shank being wrapped. After this let me tell you that the size of the hook eye will loop roughly when you are done wrapping the goal. So let me tell you that leading and extending below the coil always needs to be roughly 0.5 inches or 1.3 CM for it. After this, let me tell you that by wrapping around the sank 7 to 8 times with practice, you will be able to create lobes that I just of the right size to wrap around. So let me tell you that to probably hold your knot anyhow if you manage to put 5 to 6 coils. So let me tell you that if you need to create a stronger, not them, there are required more coils to use of the loop that finds as well, but it won’t make you are not any stronger.
So let me tell you that the hook to the shank is the loop you need to pull the standing end away from it. After this, let me tell you back you need to release the pressure over the hook eye, but if you maintain a light but secure pinch grip over the seven to eight coils. After this, let me tell you that you need to do the full slow on the standing in line with the help of your free hand, and any slack remaining at the end of the loop will disappear. So let me tell you that for the next move, maintain the grip on the standing end of the line.
So let me tell you that to secure the knot, you need to pull both the standing and leading ends. After this, let me tell you that you need to keep holding the standing end with one hand and then slowly slide your pinching finger down to grip only the stub of the leading that’s below the coils. So let me tell you that to tight and secure the not, you need to tug on each and simultaneously to draw the coils. After this, let me tell you that before doing this, you may need I want to lubricant the line by dipping it in the water or spitting on it. So let me tell you that to make tightening it easier and by reducing friction along the coil, the lubricating line is made.
So let me tell you that if necessary, trim the tag end. After that, let me tell you that with the help of small scissors or fingernail clippers, you can go ahead and trim it off if there’s more than 0.5 inches or 1.3 CM of leading end sticking out below the coils. After this, let me tell you that you can also leave the stub alone.
Easy Snell Knot.

Here is a simple way to tie an easy snell knot, so follow the steps mentioned below.
So let me tell you that through the hook eye and along the shank, you need to feed the line. After this, let me tell you that you need to pass about 6 inches or 15 CM of leading and the lines through the eye or a length that is twice that of the hook, whichever is longer. After this, let me tell you that some people say using the same side as the tip of the hook provides better fishing results, so it’s up to you which side of the eye you feed the line into. So let me tell you that below the eye and above the curved section means the straight portion of the hook is the eye’s closest loop at one end. After this, let me tell you that while tying any type of snell knot, be careful not to hook yourself.
So let me tell you that here under the shank, you need to create a small loop and run the leading end. After this, let me tell you that while the curve of the hook starts, keep the line alongside the hook and shank about to point there. So let me tell you that you need to create a point of the loop which is directed away from the curve of the hook. Afterwards, let me tell you that you need to feel the end of the line which is also the end of the loop, and underneath both the shark and the line itself again and the point where the curve of the hook begins. After, just let me tell you that under the shank, run about 4 inches, all 10 cm of excess line.
So let me tell you that around the shank, five to 7 times, wap the 4-inch or 10-cm leading end. After you sleep, tell me that around both the shank and the section of the line that runs alongside it makes fairly tight coils that do not overlap them. So let me tell you that you need to consider seven wraps to be the magic number while fewer than five wraps won’t make a tight enough knot, and while more than seven starts to become overkill, that is, the line will break before the not will be regardless.
So let me tell you that through your loop, you need to feed the remainder of the leading end back. Loop you created earlier. After creating 5 to 7 fairly tight coils, you should have enough free line to thread through. After this, let me tell you that it is better to undo the entire knot and start over, or if not, undo one or two coins at the risk of weakening the knot. After, just let me tell you that it’s okay. You have more, but you only need about 0.5 to 1 inch or 1.3 to 2.5 CM of during to pass through the loop.
So let me tell you that while lightly pinching the coil, you need to pull the leading end. Let me tell you that doesn’t reach them tightly. Only use the thumb and forefinger of your hand to prevent the coils from unraveling. To give it a steady tug, on the other hand, things are the leading end that has passed through the loop. Against the shank, pull the leading end by tightening the coils. In tennis, if you pinch them too tight, you won’t be able to pull the leading end, and if you don’t pinch the coil, they will unravel. So let me tell you that all that’s needed is light pinching pressure. So let me tell you that to tighten the knot, fill the leading and standing ends of the line. After this, let me tell you that to finish the knot, you need to clip the excess leading end.


